How to Color a Clear Umbrella: Easy Step-By-Step Coloring Tutorial for Beginners
- Pillie and Pop

- Jan 21
- 3 min read
Updated: Apr 21
Follow Along with This Free Coloring Practice Page!

How to Color a Super Cute Clear Umbrella!
Learn how to color a super cute clear umbrella that actually looks transparent with this step-by-step coloring tutorial! This technique is perfect for artists of all skill levels who love adding fun effects to their artwork. Follow along with the video, the step-by-step guide, or download the free printable to color along with the tutorial. We hope you love this technique as much as we do! Happy coloring!
Supplies:
For this tutorial, you will need:
Background colors in your preferred medium
A white gel pen or acrylic marker
A colorful acrylic marker or gel pen for the umbrella handle
Coloring supplies and a black pen for any objects that appear behind the umbrella
White metallic glitter glue (optional)
Step 1: Draw in and Color Anything behind the Umbrella

Using a black pen, draw in anything behind or inside the umbrella.
Then color in those objects, ignoring the umbrella lines.
Step 2: Background

Color in the background however you like best, disregarding the umbrella lines.
We drew a rainbow in the sky with watercolor colored pencils—a super cute addition to any rainy page!
Step 3: Color Over the Lines

Using a white gel pen or a white acrylic marker, color over the lines of the umbrella.
This begins to give the umbrella a transparent appearance.
Step 4: Polka Dots
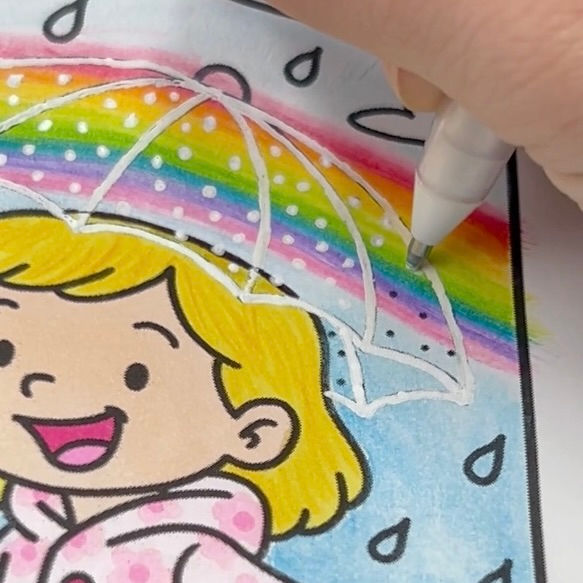
Using a white gel pen (or acrylic marker), add white polka dots to the umbrella.
You can do a different design if you like, but I found that adding some sort of design to the umbrella helps a lot with the clear look.
Step 5: Umbrella Stick

Using an acrylic marker (or gel pen), color in the umbrella stick, coloring over the black lines too.
Then draw in the missing part of the umbrella stick inside the umbrella, using the same acrylic marker (or gel pen).
Step 6: More Polka Dots

Add a few more dots over the umbrella stick.
This helps show the umbrella stick is inside the umbrella, behind the clear layer.
Step 7: Metallic Glitter Glue (Optional)

Using a paintbrush or the top of the glue bottle, paint white/clear metallic glitter glue onto the umbrella.
This adds a layer of shimmery clear over the umbrella.
I used CraftSmart Metallic Glitter Glue (available at Michaels), but similar metallic or clear glues should work as well.
Step 8: Color Over the Lines again

Using a white acrylic marker (or gel pen), color over the lines again after the glue has dried.
This finishes the clear look and helps show that the umbrella is in front of the background.
Step 9: Color Over the Dots Again Too

Using a white acrylic marker (or gel pen), color over the dots again.
This helps show that the dots are part of the umbrella design, not the background behind it.
Step 10: Try it on an Actual Coloring Page!

Try these steps on any page you like and make it your own. Mix up the colors, add fun details, and color your clear umbrella in your own special way!
We would love to see how yours turn out! Tag us on TikTok or Instagram @pillieandpopcoloring so we can admire your artwork!
If you like coloring and would like to receive free coloring pages and updates of new posts like this one, make sure to Subscribe to our Email List!
I hope you enjoyed this post and found a little inspiration for your next coloring project. If you’re ready to add new favorites to your collection, you can find all our coloring books on our shop all page linked below.


Comments